
In this article I explain how to create a copy of the running Magento online shop system. One of the purposes of having duplicates is e.g. the need of the separation of the developing an test environment. Tests are very important. Especially in Magento ;) Many people do official Magento upgrades on productive environments and suffer from it. You don’t need to do so, use always test environment first!
So the copy process of Magento shop has following main steps
- Copy of database schema
- Copy of core sources
- Copy of downloader sources
Copy Magento Database
First, let me say, that it is good idea to not install two Magento instances to the same database (schema). Magento in version 1.1.8 has 198 database tables. Most of them are of type InnoDB and they are related with each other by checked foreign key constraints. That is background information.
So new database schema for every Magento instance save you from having headaches and this not only because having just two magento installation in one DB leads to approx. 400 tables in one database but more to avoid possible problems or side effects with constraints and Co.
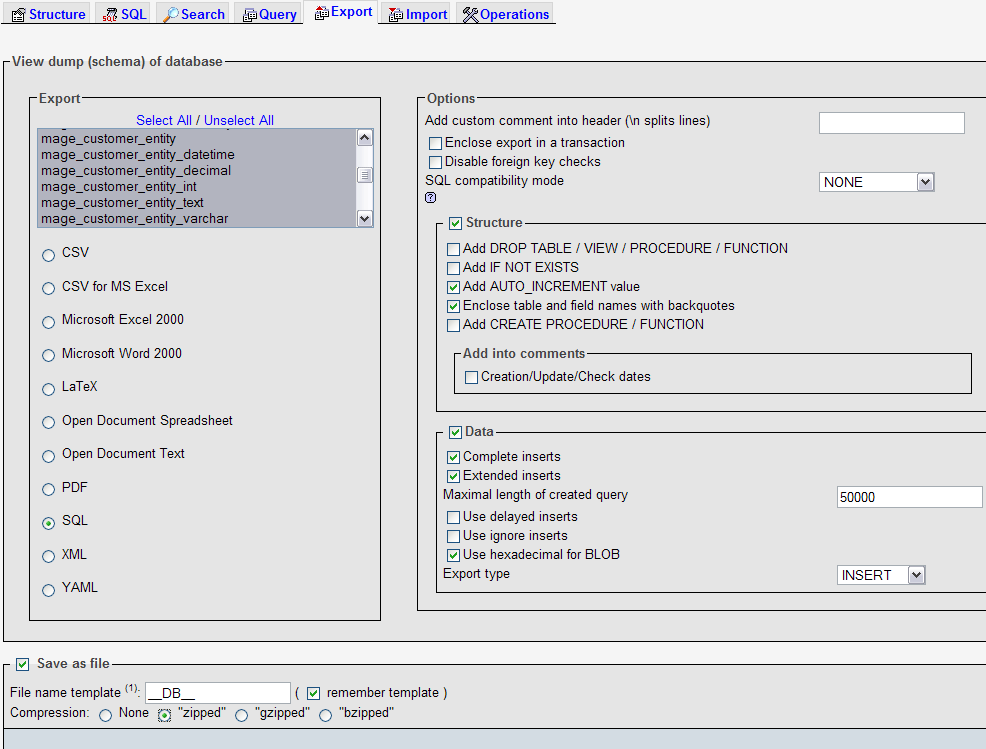
The easiest way to export the database is to use phpMyAdmin. Go to export dialog of original database, select “zipped” option, select tables, let other options on their defaults (See screen 1) and get zipped download. Switch to new database and upload the downloaded there in the import dialog.
Sound as a piece of cake, but sometimes the import of the SQL files will not work. I have already seen many different exceptions bu trying. Beginning with “SQL Syntax..” and ending with “constraint violation…". In my opinion the purpose of problems is size of some tables and therefore of whole backup. There are few MyISAM tables that are full with (useless) log data. And the amount of this data makes problems to the import routine. Don’t export them first at time! they don’t have any constraint to other tables so you can import them on second or third turn. Alternative you can export only the DDL-Statement of this table not the data itself.
Here are tables you can omit in first step:
- log_url
- log_url_info
- log_visitor
- log_visitor_info
Don’t forget to change configured URL of origin shop to the URLs of new shop in the table core_config_data. You can also use Search-Tool of phpMyAdmin and identify every record where old URL is used - but outside of core_config_data table they are not so important and could be changed later in the Shop interface.
Core Sources
That is most easiest part. Just copy the source of magento to the new location, but don’t copy the following:
- downloader dir
- any content of dirs inside of var but
.htacces*file. - media/tmp dir
If you use another DB for new Magento installation don’t forget to change DB setting in app/etc/local.xml file. Var directory hold any temporary content like sessions, caches and error-logs. Downloader is used by Magento connect module, before copy must do some preparations.
Magento Downloader
Warning! do not copy unchanged downloader to new location on the same server it may break your origin magento installation!
The problem is that downloader stores serverpath in many many configuration files. And if you don’t change the serverpath and start updates on new shop copy, you will update the origin shop and not the new copy of it!
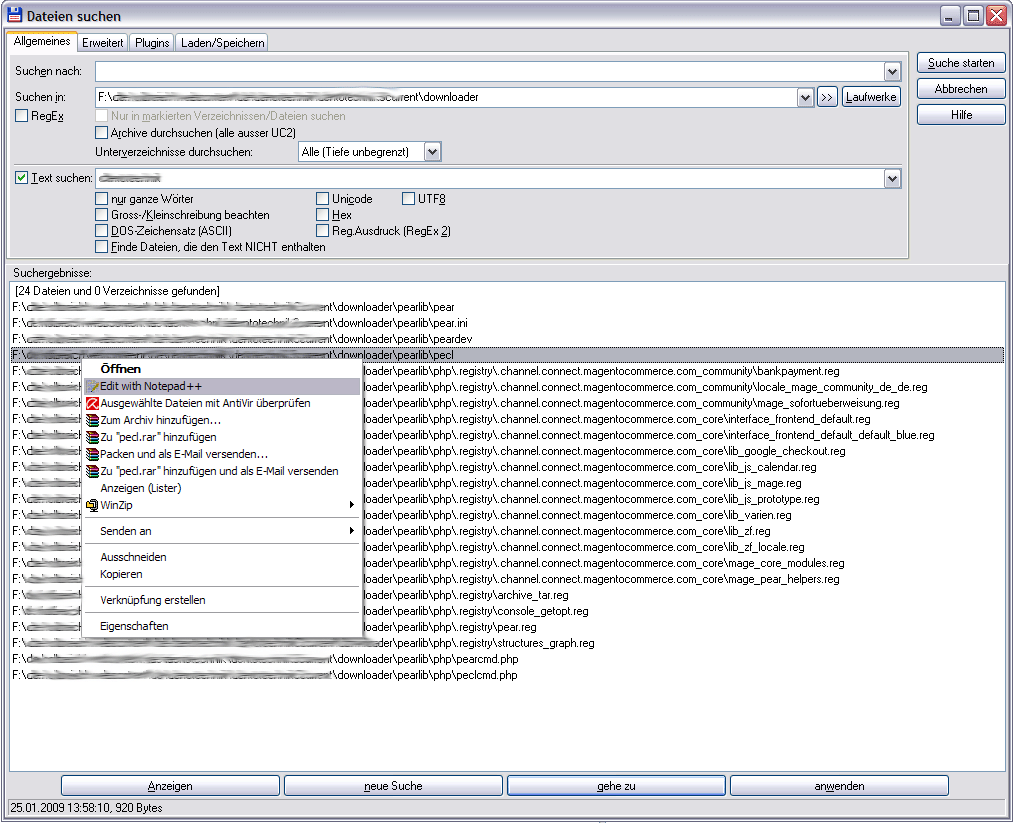
The server path of origin magento shop is stored in many many files in the downloader directory, you can’t change all of them manually. But you can do it automatically. If you have SSH access to your web-space following command will help you:
Update: The described way to handle downloader sometimes causes problems by doing upgrade. Especially pear.ini should be treated carefully.
//shows all files with OLD_PATH element
find  . -type f -exec grep -q "OLD_PATH" '{}' ; -print
//Replaces OLD_PATH string in all occurrences in every file to NEW_PATH
find . -type f -print | xargs sed -i -e ’s/OLD_PATH/NEW_PATH/g’
If you have only ftp access, then you can use [Alt+F7]-search in Total Commander. Then open each file with Notepad++ and then use “Search and Replace” functionality of Notepad++ on each file. Whole replacement will take you max. 5 minutes.
After replacing old path you can upload downloader to the new instance of Magento.
Now everything including “Magento Connect” should work properly and independent from each other on throw instances. The last thing my be useful is to clear all caches in admin back-end of new instance. Good luck! ;)
Open Question
This article describes how to double the Magento instance once. The next question which i didn’t answered for me yet is how to make permanent mirroring of data from production environment to the test installation. Maybe someone has cool ideas?
Disclaimer
Please consider that I can’t guarantee that everything described here will work in your environment as it worked for me. Please use this tutorial as incitement and adopt my methods to your own situation. Be sure that you don’t peril origin Magento installation or other data. Do regular backup before you begin!