Today i will share some thought on software RAID under linux with you.
Sometimes you need to store data relative save and high available. That is where RAID solutions come in to play. Especially RAID 1 (mirroring) based solutions provide better availability of your data. But don’t forget to use backups anyway :)
Some days ago i installed RAID 1 on Debian Lenny (amd64 arch) without any troubles for now. <UPD Dez 2015: Here missing reference to initial tutorial from Jerry>
The Partitions used in the RAID /dev/md0/ should both enable boot flag if you want to boot from RAID.
This is worked for me. 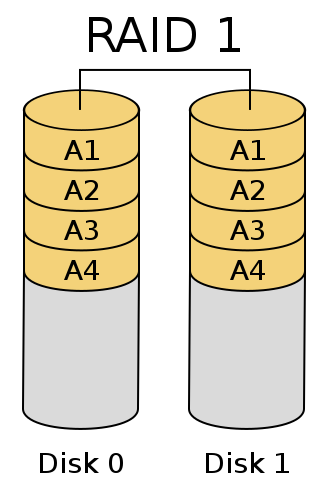
Configuration
My configuration is the same as Jerry’s except partition sizes and chosen LVM. So boot is done form RAID partition* /dev/md0*. And SWAP is on RAID too, which is controversy solution but it the best one for me, of course availability of a system is primary goal.
So how to check the state of raid after installation. The simplest is to look on /proc file-system with cat /proc/mdstat. Here is my configuration.
cat /proc/mdstat
Personalities : [raid1]
md1 : active raid1 sda2[0] sdb2[1]
476560128 blocks [2/2] [UU]

md0 : active raid1 sda1[0] sdb1[1]
497856 blocks [2/2] [UU]

unused devices: <none>
Here you see two RAID arrays md0 and md1. Also information about used devices and state are present. [UU] stand for "used" for every disc is used in a raid. On disk failure you wold see something like [U_]and sdb2(F)`.
Next example utilizes mdadm which is used by kernel in latest kernel versions. My is 2.6.26-2-amd64 (lenny default)
Use of --detailor -D option with a device name gives more information. Here my example.
# mdadm --detail /dev/md1
/dev/md1:
Version : 00.90
Creation Time : Wed Jan  6 00:51:37 2010
Raid Level : raid1
Array Size : 476560128 (454.48 GiB 488.00 GB)
Used Dev Size : 476560128 (454.48 GiB 488.00 GB)
Raid Devices : 2
Total Devices : 2
Preferred Minor : 1
Persistence : Superblock is persistent

Update Time : Mon Jan 11 02:18:01 2010
State : clean
Active Devices : 2
Working Devices : 2
Failed Devices : 0
Spare Devices : 0

UUID : fe3bbbfd:2c6963e7:9785a408:be715448
Events : 0.8

Number   Major   Minor   RaidDevice State
0       8        2        0      active sync   /dev/sda2
1       8       18        1      active sync   /dev/sdb2
GRUB Config
If you wish that your system is able to boot even if one of disks fails completely. You need to write GRUB loader on every hard disk separately.
Here the example for hd0 ( fist hard disk)
grub
#---
grub> root (hd0,0)
Filesystem type is ext2fs, partition type 0xfd
grub> setup (hd0)
setup (hd0)
Checking if "/boot/grub/stage1" exists... no
Checking if "/grub/stage1" exists... yes
Checking if "/grub/stage2" exists... yes
Checking if "/grub/e2fs_stage1_5" exists... yes
Running "embed /grub/e2fs_stage1_5 (hd0)"...  17 sectors are embedded.
succeeded
Running "install /grub/stage1 (hd0) (hd0)1+17 p (hd0,0)/grub/stage2 /grub/menu.lst"... succeeded
Done.
Run the same also for second disk.
grub> root (hd1,0)
...
grub> setup (hd1)
Also your GRUB configuration should enabe loading form the first and alternatively the second disk.
default 0
fallback  1
# is there after installation
title           Debian GNU/Linux, kernel 2.6.18-6-686 Raid (hd0)
root            (hd0,0)
kernel          /boot/vmlinuz-2.6.18-6-686 root=/dev/md0 ro
initrd          /boot/initrd.img-2.6.18-6-686

# manually created
title           Debian GNU/Linux, kernel 2.6.18-6-686 Raid (hd1)
root            (hd1,0)
kernel          /boot/vmlinuz-2.6.18-6-686 root=/dev/md0 ro
initrd          /boot/initrd.img-2.6.18-6-686
The default option declares the first configuration to run on default. fallback option forces grub to load fallback configuration (here hd1) when the first one could not start.
you’re done.
Basic Monitoring
Once you run your “high”-available RAID you’re probably very interested to be informed about problems with it. E.g. on a failure of one (hope only one) HD device.
Yet i know only two most common solutions for monitoring Software RAID. First of it bases on Nagios, but is not described here, because not Ive not tried it yet. The second is to involve mdadm again.
The option --monitor causes mdadm periodically poll a your md arrays and to inform you on every events that occurs. mdadm should never exit process, so it should normally be run in the background.
Here is example of sending a mail on event. Of course sendmail must be configured.
mdadm --monitor --mail=admin@yourcompany.com --scan --delay=1800 -ft
It would run a monitor daemon which scans all of RAID arrays with delay. The option fstarts it as daemon process and t option generates test messages on a startup.
When you want to run mdadm through crone job so use option -1
mdadm --monitor--scan -1
Also this would send your mail or run program which are specified in /etc/mdadm.conf file. Please see mdadm manual for more details.
Test Performance
You can test our physical drives with hdparm utility e.g.
hdparm -tT /dev/hda
But hdparm would not correct work on your mdX RAID arrays.
So one of the simplest methods is to try time utility.
time dd if=/dev/md0 of=/dev/null bs=1024k count=1000
This test reads 1 GB data file from you RAID Array but reports to copy only something like “509804544 Bytes (510 MB) in 5,73989 s, 88,8 MB/s” by me. So why only half of the Gigabyte? Just be cause it utilizes two devices, as i think, and indeed it copies 500MB two times parallel = 1 Gig. And this only in the half of time as it needed to red 1 Gigabyte from physical /dev/sdadirectly.
time dd if=/dev/zero bs=1024k count=1000 of=/home/1Gb.file
This test writes 1 Gb file on RAID partition /home . Therefore you can compare write performance with RAID and non raid partitions but don’t expect any considerable advantages on Mirroring systems ;)
The last one more professional but also complex tools is iozone. It can perform a various of tests,which can’t be explained here detailed.
Please read manual if you really need to test your raid that way. Alternatively you can start iozone in automatic mode, which performs various of tests (relative long-running) and prints on console.
iozone -a
See on Strided Read column which should consider software RAID bonus.
Failure and Recovery
RAID 1 should preserve you from data loose and improve your scalability. So it is very good idea to has relative good knowledge of what to do on Failure. Best way to get this knowledge is to simulate failure. Take try to remove one disk and put it again into array.
Upd 19.11.2017 Recovery example
Lets’ recover from a failure that happened in real.. cat /proc/mdstat and lsblk show same picture: sdb1 failed. Do not know exactly reason, but still it’ happened last month
cat /proc/mdstat
#---
Personalities : [raid1] [linear] [multipath] [raid0] [raid6] [raid5] [raid4] [raid10]
md1 : active raid1 sdb3[2] sdc3[1]
      1946677112 blocks super 1.2 [2/2] [UU]

md0 : active raid1 sdc1[1]
      2927604 blocks super 1.2 [2/1] [_U]

lsblk
#---
NAME    MAJ:MIN RM  SIZE RO TYPE  MOUNTPOINT
sda       8:0    0 59.6G  0 disk
└─sda1    8:1    0 59.6G  0 part  /
sdb       8:16   0  1.8T  0 disk
├─sdb1    8:17   0  2.8G  0 part
├─sdb2    8:18   0  3.7G  0 part  [SWAP]
└─sdb3    8:19   0  1.8T  0 part
  └─md1   9:1    0  1.8T  0 raid1 /home
sdc       8:32   0  1.8T  0 disk
├─sdc1    8:33   0  2.8G  0 part
│ └─md0   9:0    0  2.8G  0 raid1 /var
├─sdc2    8:34   0  3.7G  0 part  [SWAP]
└─sdc3    8:35   0  1.8T  0 part
  └─md1   9:1    0  1.8T  0 raid1 /home
This fix is easy, just include failed drive to array again.
mdadm --manage /dev/md0 -a /dev/sdb1
This is second time in last month, looks like one of the drive begins to die… :( Had years of working with a lot of reboots without any problems before.